How to automatically create Google Calendar Events from your Twice bookings
This guide will help you connect your Twice account to your Google Calendar and automatically create calendar events from your new Twice bookings. An easy way to visualize your bookings in a calendar view. This will take approximately 10 minutes and you won't need any technical skills to create the connection!
On this page
Step by step guide to creating the connection
Prefer watching a video instead?
Step by step guide to creating the connection
After setting up your Google and Make account as outlined in the prerequisites --> you should have now opened the template in make.
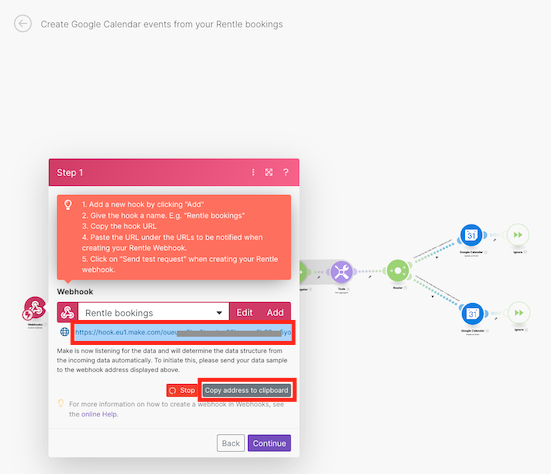
Step 1
- Select create a webhook.
- Give the webhook a name. For example “Rentle bookings” and click Save.
- Copy address to clipboard and leave this window open.
- Open your Twice Admin App integrations page via Account > Integrations and click Add webhook and apply the following:
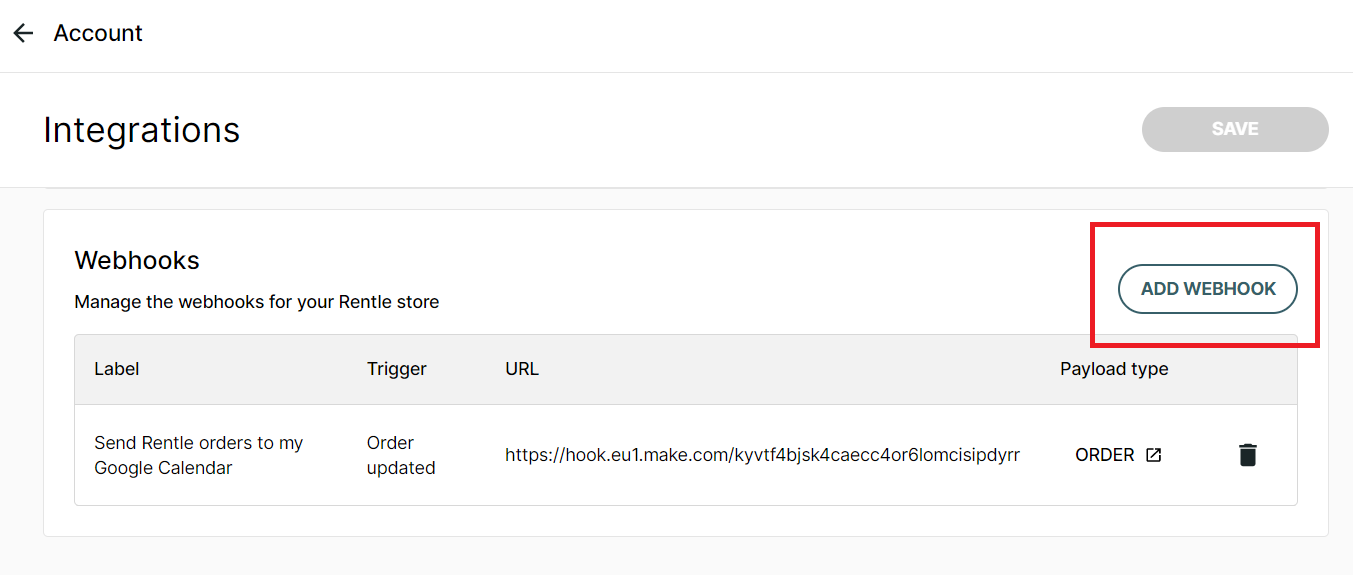 4.1 From the Triggers on dropdown, select order/updated and click Next. 4.2 Paste the address you copied from make into the URL field. Click Add and then Next.4.3 Test your webhook by clicking Send test request -> The status should turn to Success, then click Next.
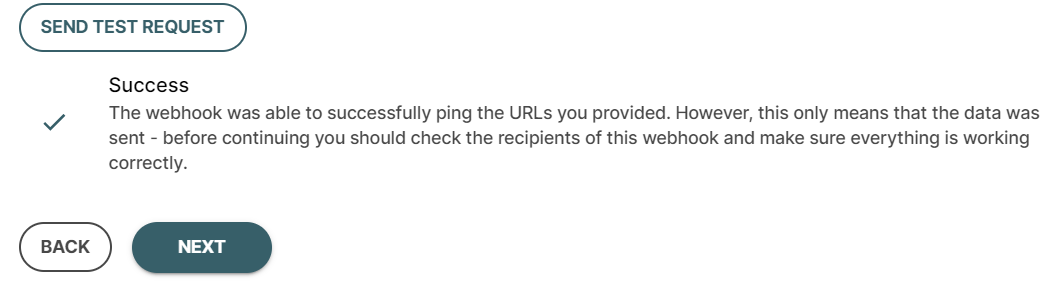 4.4 Create a descriptive label / name for your Twice webhook a name. For example “Send Twice orders to my Google Calendar” and click Create webhook.
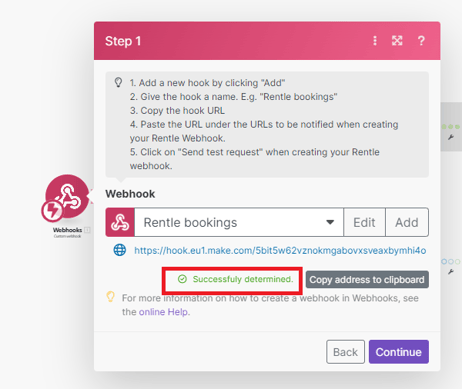
- Go back to your open Make scenario , verify the webhook status changed to Success and click Continue.
Step 2
- Enter your Google Account (your google email address) under Connection and select the Google calendar you created earlier under Calendar ID. Click Continue.
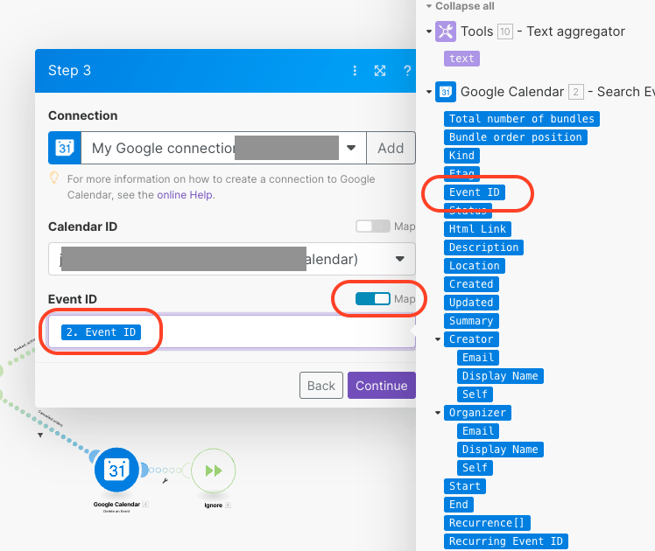
Step 3
Now you'll need to add your Google Account details to the three modules highlighted below. The instructions will review each module in the order highlighted in the image:
- Click on the first Google Calendar module and apply the following: 1.1 Enter your Google Account (your google email address) under Connection and select the Google calendar you created earlier under Calendar ID1.2 Under the Event ID section, toggle-on the Map field. Click on the field and select Event ID from the list. 1.3 Click Continue from the bottom.
- Click on the second Google Calendar module and apply the following:2.1 Enter your Google Account (your google email address) under Connection2.2 Click Continue from the bottom.

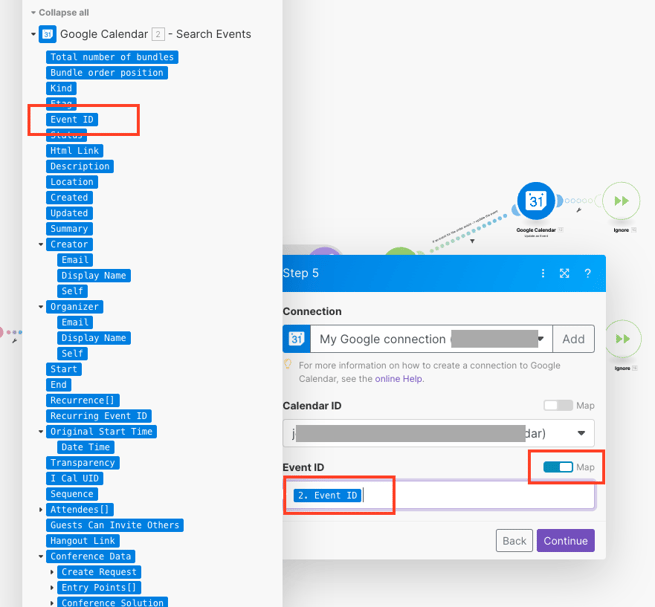
- Click on the third Google Calendar module and apply the following:3.1 Enter your Google Account (your google email address) under Connection and select the Google calendar you created earlier under Calendar ID 3.2 Under the Event ID section, toggle-on the Map field. Click on the field and select Event ID from the list3.3 Click Continue from the bottom.
Final Step
Save your scenario and toggle it on.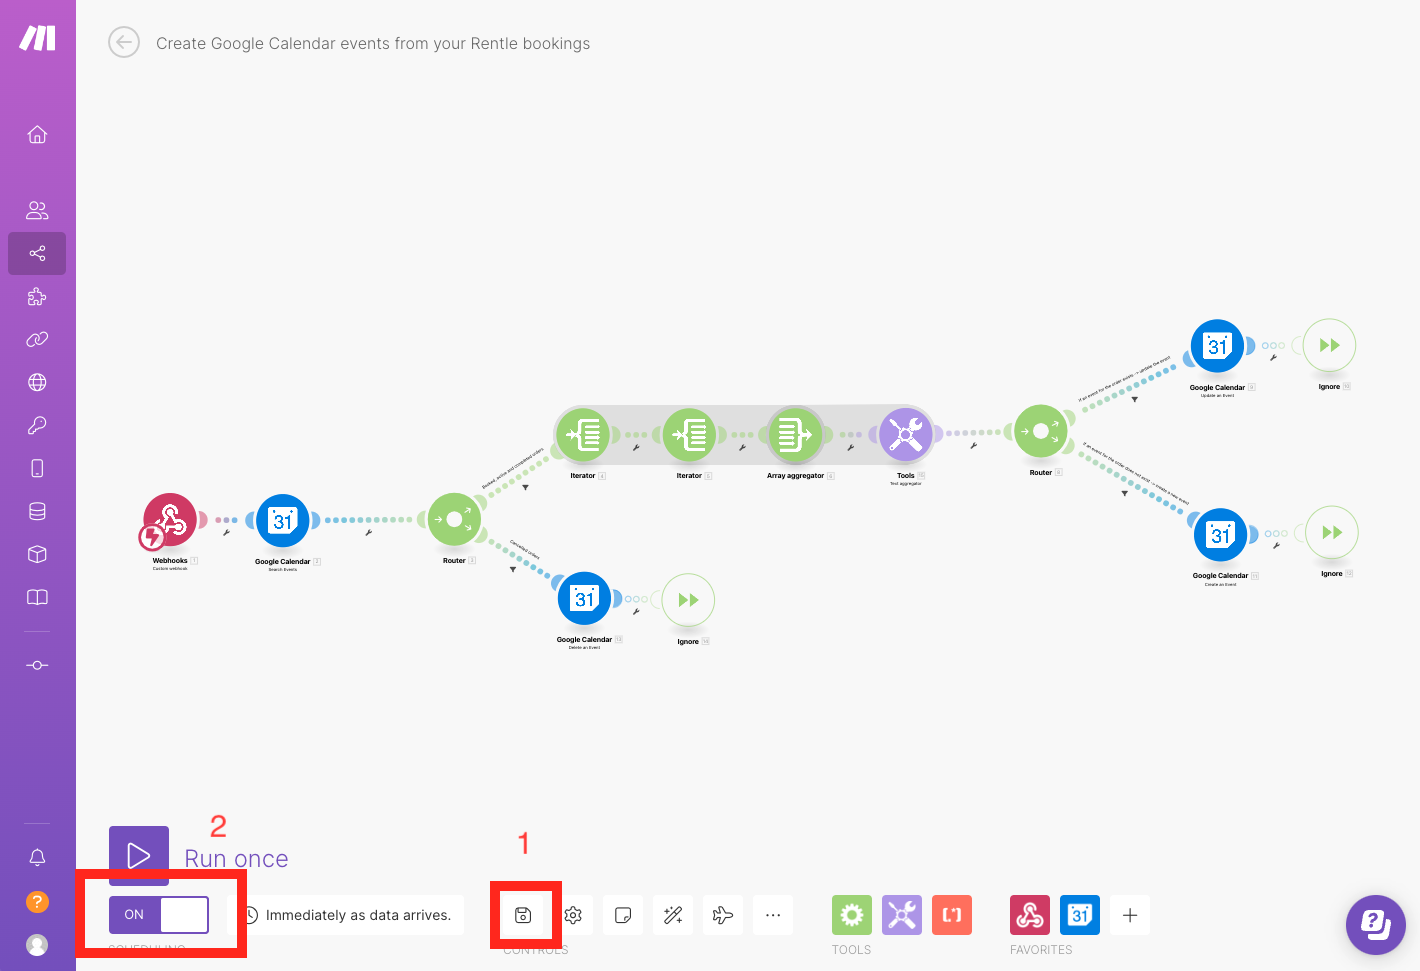
All newly created orders will from now on appear in your Google Calendar within mere seconds. Modifications and changes to your orders will automatically update in your Google Calendar as well.
Note: This automation will not migrate your existing orders to your Google Calendar.
Prefer watching a video instead?
You may want to open this video in full screen.